Reader Collection > Blog > Picture Books |
||
 |
||
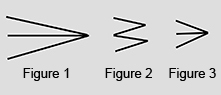
| Books with woodblock-printed pictures of flowers-and-birds were made in Japan for about three-hundred years (i.e., early 1700s to early 1900s). A book's picture-sheets were joined using one of three different methods. The simplest but least used method (10% of books) was to stack the sheets, punch several holes along one edge of the stack and insert string through the holes. When viewed from above, the picture book looked like an elongated fan (Figure 1). | ||
 |
||
| In the second method (30% of books) each picture-sheet was folded inwards so that the picture was no longer visible and the folded sheets were stacked. Glue was placed along opposing back edges of each of the folded picture-sheets and the glued edges were pressed together to join the folded pictures back-to-back. When viewed from above, the picture book resembled an accordion (Figure 2). In the third method (60% of books) each picture-sheet was folded outwards (i.e., pictures visible) before being stacked. Several holes were punched along the unfolded edge of the stack and string was inserted through the holes. When viewed from above, the picture book looked like a short fan (Figure 3). |
||
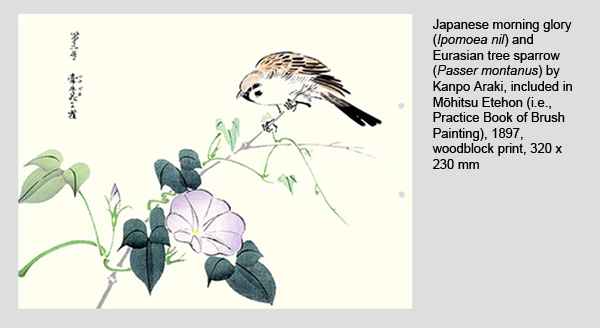
Pictures were typically oriented horizontally (i.e., wider than tall) in books where sheets were held together by string at one end (i.e., method 1). A sheet from one of these books, with two binding holes visible on the right edge, is shown below. |
||
 |
||
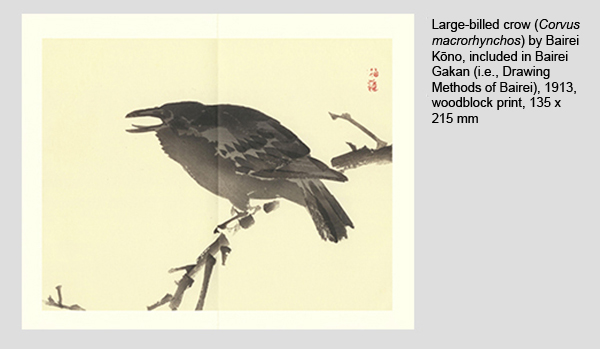
| In books with picture-sheets folded inwards then glued back-to-back (i.e., method 2) the picture designs were also oriented horizontally in most cases. The picture fold is clearly visible in the example below. | ||
 |
||
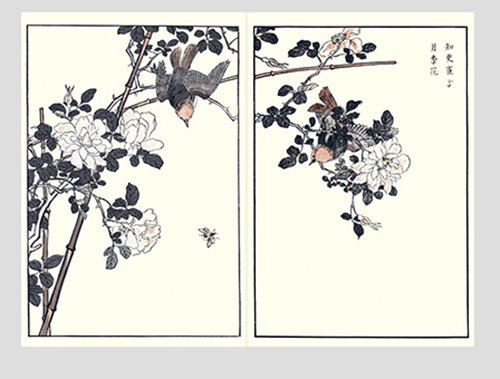
| In books where picture-sheets were folded outwards instead of inward and bound together with string (i.e., method 3) some pictures were oriented horizontally while others were oriented vertically. For vertically-oriented pictures, two such pictures were printed side-by-side on a single sheet and the sheet was then folded in between the two pictures, as shown below. Note the binding holes on the left and right sides of the sheet. | ||
 |
||
| For horizontally oriented pictures, the left half of the picture was printed on one sheet and the right half of the picture was printed on a second sheet, as shown below. | ||
 |
||
| When the picture-sheets were stacked and joined together the two halves of horizontally oriented pictures were still separated by a gap, as shown below. A picture with this two-part format is called a diptych. They are very common in Japanese printed art because method 3 was used most often to make picture books. | ||
 |
||
Additional Reading |
||